Showing posts with label Ubuntu. Show all posts

Saturday, March 14, 2015

Install MplabX On Linux Ububtu 64 Bit

Searched so many answers every time I re-install my Ubuntu, here it is so I never forget or search again,


This is to install the 32bit libraries.  we need these to run MplabX.
sudo apt-get install libc6:i386 libx11-6:i386 libxext6:i386 libstdc++6:i386 libexpat1:i386
Also, we need to install Java SDK or RTE.  Openjdk...
sudo apt-get install openjdk-8-jre  openjdk-8-jdk
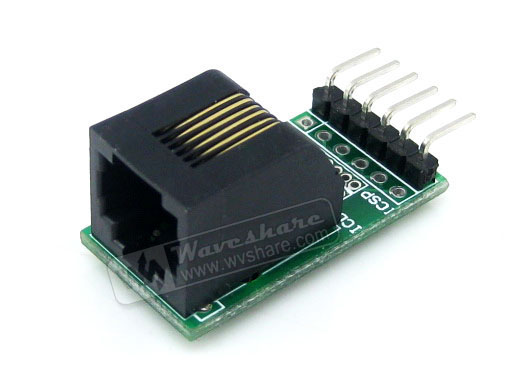
Also, I need to mention how to wire the ICD3 to connect to flat connector that would work with PICKIT3.
These are the Pins/Wires Order and numbers:

  1. Blue
  2. Yellow
  3. Green
  4. Red
  5. Black
  6. White


Reference:
http://blog.laczik.org/microchip-mplabx-installation-on-64-bit-ubuntu-system/
http://www.electronic-products-design.com/resources/customer-guides/manufacturing/ibex-microchip-icd2-programming-cable

Saturday, September 14, 2013

Installing Eclipse from the website on Ubuntu 13.04

I found these instructions on one of the websites discussions:

If you've downloaded Eclipse from their official website, follow these steps for the installation.
  1. Extract the eclipse.XX.YY.tar.gz using
    tar -zxvf eclipse.XX.YY.tar.gz
    
  2. Become root.
    sudo -i
    
  3. Copy the extracted folder to /opt
    cp -r eclipse.XX.YY /opt
    
  4. Create a desktop file and install it:
    gedit eclipse.desktop
    
    and copy the following to the eclipse.desktop file.
    [Desktop Entry]
    Name=Eclipse 
    Type=Application
    Exec=eclipse
    Terminal=false
    Icon=eclipse
    Comment=Integrated Development Environment
    NoDisplay=false
    Categories=Development;IDE;
    Name[en]=Eclipse
    
    then execute the following command to automatically install it in the unity:
    desktop-file-install eclipse.desktop
    
  5. Create a symlink in /usr/local/bin using
    cd /usr/local/bin
    ln -s /opt/eclipse/eclipse
    
  6. For eclipse icon to be displayed in dash, eclipse icon can be added as
    cp /opt/eclipse/icon.xpm /usr/share/pixmaps/eclipse.xpm
Notice:
I found out that I need to install Java RTE or JDK from Java.com

I wanted to make sure I do not lose it again...

reference:
http://askubuntu.com/questions/26632/how-to-install-eclipse
http://www.eclipse.org/downloads/?osType=linux


Saturday, July 6, 2013

How to get Ubuntu to play Amazon instant Movies

I finally got to try Amazon Prime membership and started to use the futures including free shipping on some of the items listed, and play the instant movies that will work only on some of the Operator Systems.

What a disappointment, it does not work on all the Android devices that I have, however, it works on
Amazon Kindle!!!  I thought that that runs a version of Android too, so why not the rest of Android devices?

I found a fix on here though...
you will need to download the Free flash player APK from here


Now, my Ubuntu can not stream these movies, Why?
Here is fix:

sudo mkdir /etc/hal/fdi/preprobe

sudo mkdir /etc/hal/fdi/information

/usr/sbin/hald --daemon=yes --verbose=yes

rm -rf ~/.adobe


References:
http://askubuntu.com/questions/286297/is-there-a-work-around-to-get-protected-hulu-or-amazon-prime-instant-videos-work

http://forum.xda-developers.com/showthread.php?t=1774336

Monday, May 20, 2013

Interfacing to the PandaBoard GPIO, SPI, etc...


Here is my experience/adventure with PandaBoard trying to use its SPI, GPIO interfaces.
This is a work in progress so, I am documenting as I progress.

GPIO are found @
/sys/class/gpio
and then need to export as root...
#echo "50" > export
# echo "39" > export
# echo "38" > export
# echo "37" > export
# echo "out" >  gpio51/direction
# echo "out" >  gpio50/direction
# echo "out" >  gpio39/direction
# echo "out" >  gpio38/direction
# echo "out" >  gpio37/direction

# echo "1" > gpio38/value
# echo "0" > gpio38/value
# echo "1" > gpio38/value
# echo "0" > gpio38/value
# echo "1" > gpio38/value
# echo "1" > gpio37/value
# echo "0" > gpio37/value


To read from GPIO that is set as Input:
# cat /sys/class/gpio/gpio34/value

I will need to use 
chmod 666 /sys/class/gpio/gpio38/value
OR
Change the rc.local  

Now, How do I do this from C program:
This file will show in details how to do all the above from C program.
Note: You will have to run this program using sudo ./Test_IO_1 until I find how to create the GPIO on boot and make it accessible to all users
Makefile
Test_IO_1.c
I included the Makefile so you can compile the C program.  I compiled the code natively, which is on the Pandaboard itself.

  1. Make a folder, Test_IO_1
  2. Copy these two files to the new folder
  3. run make
  4. you should have Test_IO_1.0 and Test_IO_1
  5. type sudo ./Test_IO_1
  6. monitor GPIO38 with a scope, multimeter or a LED

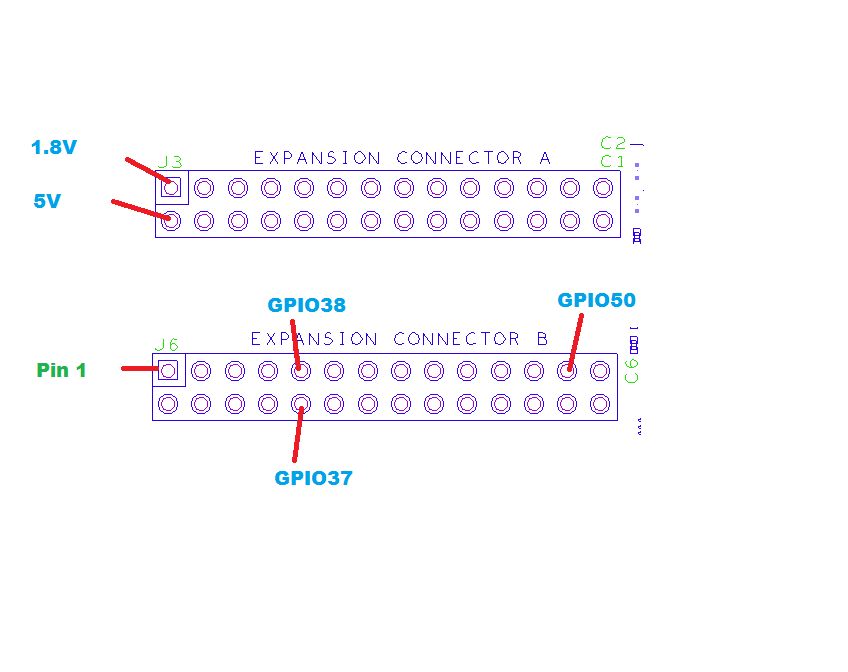
Use this image or PandaBoard datasheet to find the correct pin for GPIO38

Open a file-socket to read or write from /sys/class/gpio/gpio38/value

To Read:
rewind(fp);
fread(&read_value, sizeof(char), 1, fp);

To Write:
rewind(fp);
fwrite(&set_value, sizeof(char), 1, fp);


OK, How to modify device read/write permission on boot:
I found this tile /etc/mtab
is this the one?


Also, I found SPI stuff @
/sys/class/spi_master
There is spi1, spi2, spi3, spi4


References:
http://lxr.free-electrons.com/source/Documentation/gpio.txt
http://www.haifux.org/lectures/258/gpio_spi_i2c_userspace.pdf


https://www.kernel.org/doc/Documentation/spi/spi-summary


http://www.youtube.com/watch?v=fuEB0VCkslQ
http://comments.gmane.org/gmane.comp.embedded.pandaboard/9743
http://lxr.free-electrons.com/source/drivers/input/keyboard/gpio_keys.c


http://lxr.free-electrons.com/source/arch/arm/mach-u300/spi.c?v=2.6.34
http://elinux.org/BeagleBoard/SPI

http://www.egr.msu.edu/classes/ece480/capstone/fall12/group02/documents/Mark-Birdsall_App-Note.pdf

Monday, April 22, 2013

Disable Guest Account in Ubuntu

Ubuntu fresh installations have the guest account enabled by default.  This caused me few problem already and not really happy about it.  So, after searching and learning about this I found that there is a simple solution for it.

Start a terminal session using Alt+Ctrl+t or any other way you know,
in the terminal type the following

gksudo gedit /etc/lightdm/lightdm.conf

This command will open gedit editor with the file lightdm.conf for editing
Also, it will require root access, so your account must be in the sudoers account.
Now add the following line to the lightdm.conf file

allow-guest=false

This line will disable the guest account on this computer.
Then you should restart the lightdm using this command

sudo restart lightdm

This process is very well everywhere on the internet if you search for it, but, I like to add my own to make it easier to find and track later.