Tuesday, June 26, 2012

Switch Netbook to Classic Desktop Mode in Karmic Koala


New Ubuntu Netbook 9.10 is as nice as it can be.  they added more apps and enhanced the interface.  I do like the new Netbook desktop,  it got much better interface than the older one they had with 8.4.  The problem is I like to switch between Netbook mode and Classic mode.  the regular Application menu where you have to click on Application then go down throw the program categories and click on the app you want to start.  Well, it took me a while to figure out a way to do that.
First of all, there is no desktop switcher utility provided in 9.10, so you can not just click on switch between these two modes that easy.
Now, the change is easy, but you would not want to do this twice, there are few steps and things you will do and memorize in order to do the switch.  just follow this step by step process and you will be able to get the old classic desktop back on your 9.10 Netbook Karmic Koala.
  1. Remove the existing Netbook Menu, right click on startup icon, at the top left part of the Main Panel and select remove
    Netbook icon on main Panel
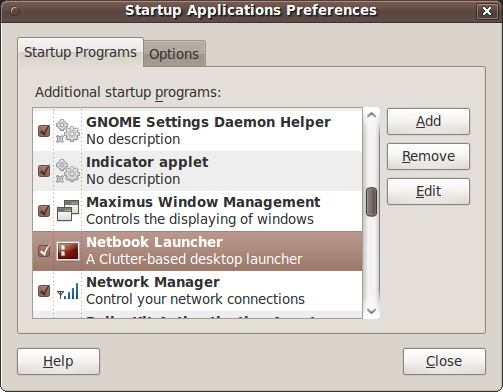
  2. Remove the Netbook Menu it self, go to System, preferences, Startup Applications and Find “Netbook Launcher” and un-check it. then find “Maximus Window Management” and un-check it.  This is the program that maximizes the window for any program you open, which gets annoying at some point.
  3. Do not worry, if you say, now that the desktop will be empty, how am I going to start of find any application, your other option to start any application is to use Alt+F1 and this will show you the main menu at any time.
  4. go to the main panel and right click.  this is the hardest part as you need to make sure you click on the correct are, all the way to the left of this panel, the menu should be as shown below.
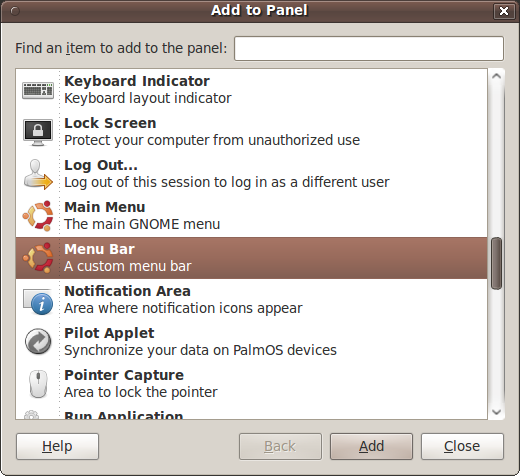
  5. Select Add to Panel
  6. look for “Menu Bar, A custom menu bar” and Add it, wallah, you got it back
I will be working on adding more Snap shots later to this so it makes it easier to follow

How to Auto scroll TextBox, ListBox, ListView


programming In C# with Visual Studio 2008

Sometimes you need to add this little trick in your code to ease using it. this trick is to force the TextBox, ListBox, ListView, or DataGridView to scroll down to the last item was entered.

Here are some info on how to do an Auto-scroll for your program controls

TextBox autoscroll

textBox1.SelectionStart = textBox1.Text.Length;
textBox1.ScrollToCaret();

ListBox autoscroll

listBox1.SelectedIndex = listBox1.Items.Count - 1;
listBox1.SelectedIndex = -1;

ListView autoscroll

listView1.EnsureVisible(listView1.Items.Count - 1);TreeView autoscroll
treeView1.Nodes[treeView1.Nodes.Count - 1].EnsureVisible();

DataGridView autoscroll

dataGridView1.FirstDisplayedCell =
dataGridView1.Rows[dataGridView1.Rows.Count - 1].Cells[0];


Note:
This blog was first published in Google Knowledge but since they shut down the project, I had to move my blogs here.

We Have to Start Somewhere!

I am working on this new ideas.  I been doing a lot of research and development and I expect a lot more to come.  So, I believe documenting is the best way to preserve this work and the best way to allow other to benefit from it.  Also, I hope other will get involved and open the door for discussions and opinions.
Here is a quick System Over View as a start point.
The first project I am working on is a USB-to-SPI Bridge, UTSB.  This bridge will manage or connect a system on the USB bus to systems on the SPI bus.

MCU Chosen for this system: PIC24HJ256GP610A
Used Microchip USB Stack and SPI Hardware interface
Started with the CDC Emulator Project provided from Microchip examples for the PICDEM FS USB.


Next: 

  1. Flow Chart of USB-to-SPI Bridge UTSB "USB To SPI Bridge"
  2. Schematic and pin-outs
  3. example code for the System
  4. Protocol used to control the UTSB
  5. Other items related to development progress